


Emory University. Fall 2025.
This week, I want you to think about using audio for particular rhetorical situations by creating a mix playlist with a group of songs.
Rules (all of which are breakable, if you have a good justification for why):
Now that you’ve completed your Literacy Narrative Comic, publish a reflective blog post of about 500 words about the writing process, paying special attention to how the work you have done has helped you to meet the Learning Outcomes for this class. That post should link to the page with your literacy comic.
Some other questions you might respond to:
I’d also like you to discuss choices you made in creating your comic and to explain why you chose the way you did. Especially if there’s something you were really trying to do in your comic which you felt you couldn’t realize as perfectly as you would if you had a lot more time, more resources, or if you could have hired an illustrator to turn your vision into exactly what you wanted. If there are aspects of your comic where you have a clear sense of what you were trying to accomplish and how you would have done so if some things were different, then explain that in your reflection. Doing so allows you to demonstrate that you have the knowledge you need about this sort of writing even if you have not yet developed all the skills necessary to make that knowledge visible in the final artifact you’ve produced.
Export your halfa kucha slideshow as a set of images (in Powerpoint: File > Export… and then in File Format select jpeg and “save every slide.” Powerpoint will create a subfolder where you tell it to and save each of your ten slides as images). Then in your WordPress dashboard create a new post and upload those images to a Slideshow block.
If you used Google Slides, you can embed the slideshow by going to File > Publish to the web and then selecting settings. It will give you an embed code that you can paste into an HTML block in your post.
Then write a couple of paragraphs reflecting on the process of writing and then giving the presentation. How was it different to construct an argument that you were giving to the class as a presentation than to write an essay? How did you make choices about the structure of your argument? If you made a choice to organize your presentation in a certain way so that your audience would follow it more clearly, is that something that you could also make use of in your written work? Was your analytical thinking process any different?
What decisions did you make about the visuals for your presentation? How did you go about creating an impact for the slides that accompany your spoken words?
What did you learn by giving this type of presentation, where you had no control of the timing of the slides and couldn’t put much in the way of text on your slides, as compared to other presentations you have given? What did you notice about your classmates’ presentations that you might think about incorporating into your own presentations in the future?
What do you think you could have done better in your presentation?
Once you have completed your Tracing project and published the pages to your site, you need to publish a reflection post as well. The post serves to turn the project in when it syndicates to the class site, and is also an opportunity for you to explain your process in the work you just completed.
Your reflection post should link to the main page for your project and also to the assignment prompt. Tell us in the post what the thesis of your essay is and give a one or two sentence preview of your argument.
You should also address the following questions:
Now that you’ve completed your Literacy Narrative Comic, publish a reflective blog post of about 500 words about the writing process, paying special attention to how the work you have done has helped you to meet the Learning Outcomes for this class. That post should link to the page with your literacy comic.
Some other questions you might respond to: How was it different to write your literacy narrative as a comic? How did you think differently once the visual component was added? How did that help you to see the story you were trying to tell in different terms? Was your analytical thinking process any different? How have your thoughts about your alphabetic literacy narrative changed in the process of transforming it into a comic?
I’d also like you to discuss choices you made in creating your comic and to explain why you chose the way you did. Especially if there’s something you were really trying to do in your comic which you felt you couldn’t realize as perfectly as you would if you had a lot more time, more resources, or if you could have hired an illustrator to turn your vision into exactly what you wanted. If there are aspects of your comic where you have a clear sense of what you were trying to accomplish and how you would have done so if some things were different, then explain that in your reflection. Doing so allows you to demonstrate that you have the knowledge you need about this sort of writing even if you have not yet developed all the skills necessary to make that knowledge visible in the final artifact you’ve produced
Objectives:

Once you’ve created your web site, you need an image to represent yourself and/or your site for the class: an avatar. Your avatar can be whatever you want it be but try to create something that both reflects your personality and speaks to the topic for this class in some way.
Start by choosing one or more of your own photos as the basis of the avatar, drawing something yourself and scanning it, or finding one or more Creative Commons-licensed images on Flickr that you can modify. (Make certain to keep a note for yourself of the URL for the photos you use if they are not your own.)
Creative Commons licenses work with copyright law so that creators can share their work in a way that allows others to use it with attribution. The video on the left gives a good overview of the concept of Creative Commons licensing. The one on the right gives more explanation of how they work. They are short and worth watching.
You can find CC-licensed images by choosing licensed images on Flickr or with an advanced Google image search.


Crop and otherwise edit the photo(s) in a photo editing application (like Photoshop or Pixlr). You can create a layered or collage effect, if you’d like. Add your name on your badge in such a way that it’s legible — it can be your full name, just your first name, or the nickname you want to be called this semester.
Your final badge should be square and at least 512 pixels wide and high. Please make certain your badge is square so that it will fit into the design on the student sites page.
When you’re done, you’ll need to put the image two places, with an optional third:

Load the badge into your Media Library and publish it to your site in a blog post. (If adding it as a feature image means that the entire square image won’t display, then also insert the image into the post itself.)
Include information and links in the post about the source(s) for images included in your badge.
Write a paragraph or two about why you chose those images, what aspects of yourself and your interests are represented in your badge, and/or what difficulties you faced in creating the badge.
Please tag your post with the tag “sk1,” plus any additional tags that you think are appropriate.
Go into your dashboard to Settings > General and select “Change Site Icon.” Load the image as your site icon.
If you do not already have a gravatar, create a gravatar account and load your avatar there. From then on, your avatar will show up as your picture when you leave comments here and on other students’ sites.
For your sketch assignment this week, I want you to create a set of visual notes for one day in one class (other than this one) that you are currently enrolled in. You do not need to take your visual notes in real time; in fact, I recommend that you don’t. I recommend that you go to your classes and take notes in whatever manner you normally do, then after class go through your notes and recreate them as visual notes.
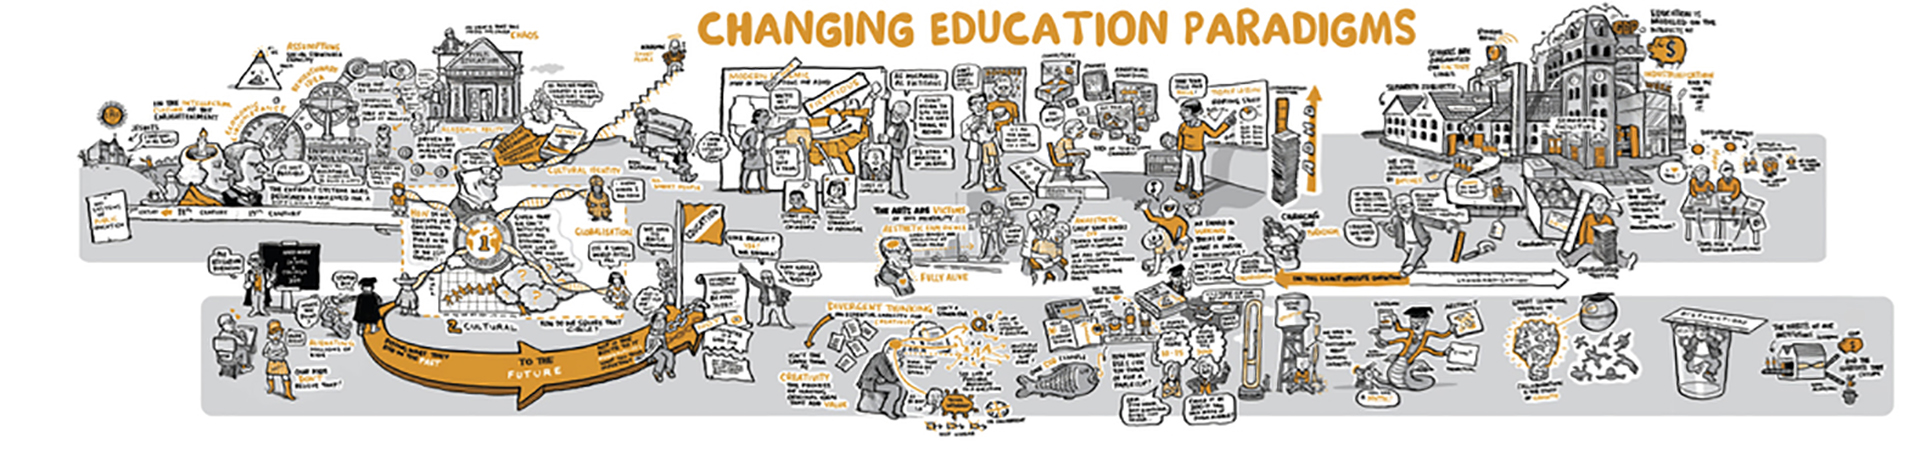
Below is an example of a professional illustrator creating a set of animated video notes to represent a lecture by Sir Ken Robinson on “Changing Education Paradigms”
You do not need to make a video like this, but only a static image.
You do not need to draw your notes in a digital environment, either, though you are certainly free to do so. If you prefer to doodle with pen, pencil, or marker on paper then do that and once you’re done with your drawing, just scan the pages as JPG files so you can upload them to your site. If you have an iPad or other tablet or would like to draw on your laptop or desktop, then you might try apps like GoodNotes, Procreate, Inkflow, or Adobe’s Sketchbook or search for other free/cheap drawing applications. I am completely tool agnostic on this assignment, so make your drawings in whatever manner make sense to you.
Your visual notes do not need to be polished or beautiful or supremely intricate, like the RSA Animate video above. Do try to take this assignment as an opportunity to really engage differently with your material – don’t just make a series of doodles that follow the outline of the lecture or discussion in your notes but try to translate the concepts and information into a new, visual set of notes. You might think about creating flowcharts or diagrams, which are also visual devices.
Once you’ve got your notes, load them onto your course site as a sketch post. Embed the images from your notes into the post and as you do, take a few moments to reflect on the process and then write a paragraph or two about what you learned during the process of creating your visual notes. Did it help you to understand the course content any differently or better to create notes visually rather than just as text? Did you discover anything new about yourself or the way you think in the process? Did you find it enjoyable or find some aspect of it particularly interesting? Someplace in your reflective text, create a link back to this blog post assignment.
Stephen Mcmennamy is an Atlanta artist and Creative Director who was at the advertising firm BBDO. He first came to my attention when I saw his series of “combophotos” that splice together two different images to form a surreal new creation.
Here are a few examples from him:


Take a few moments to look through the images he’s posted on his site linked above or on his Tumblr or his Instagram. Notice that each of these is just two rectangular images set next to each other to create a single square image. There’s no need to copy & paste or layer anything in Photoshop — simply crop two images and set them alongside each other to create a new image.
Then create your own square combophoto and publish it to your site. You can take your own photos, but probably you’ll want to use Creative Commons-licensed images you find on Flickr or Google images — make sure you give credit to the originals that you modify to create your combophoto.
The level of technical aptitude for this assignment is actually relatively small, just simple cropping and resizing. The greater part of the challenge is thinking creatively and finding images that you can work with. That said, note that Mcmennamy comes up with ideas and then specifically stages photos to combine, and he seems to often spend significant amounts of time shooting and selecting his images. You won’t have lots of time, models you can hire, or expensive photo equipment to work with, so I don’t necessarily expect your final images to be as polished and perfectly aligned as his are. More important is for you to be playful and come up with images that combine to create something funny or witty or striking.
To edit the two photos together, you can use whatever photo editing software you’d like. Pixlr is a good free web app, as is PicMonkey. Adobe Photoshop is also available for you to use on the computers in the Media Library on the 4th floor of the Woodruff Library.
Once you have your image, publish it in a post on your class site. Don’t forget to give it a funny or witty title! Tag your post “sk4“
Write a paragraph about how you went about choosing the two images you combined and why. What challenges did you face as you created your combophoto? What do you think your final image conveys?


You can see that each of these pieces is an actual three-dimensional tangible object placed into a drawing on paper to transform that object into something new. Niemann then photographs the resulting sketch to create a two-dimensional artifact.
For your third sketch assignment, I want you to create your own Sunday sketch in a similar style.


